By Kamil Jankowski | Business Intelligence Engineer
In the first part of this article, we focused on the key project requirements and tools. Here, we want to give something more to tech-savvy enthusiasts and present the technical processes and code examples. If you have not seen the previous part, please click here.
Configuration of Email Template and Attachment
Before we started working on the building reports sending process, we had to install all necessary SendGrid packages via pip. We then prepared a custom layout of the email using HTML code. We did not decide to import public templates since we preferred to use the official layout and colors that are used within our company.
It was not a necessary step, but we decided to keep the layout in a separate Python file since we wanted to use the same layout for multiple emails where some part of the email (e.g. title, header, or attachment) would depend on the report’s scheduling (daily, weekly, monthly, etc.). For this part of the project, it is always good to know the HTML language and have some design skills. Otherwise, you can always ask a friendly graphic designer for help 🙂
from sendgrid.helpers.mail import (
    Mail,
    Attachment,
    FileName,
    FileContent,
    Disposition,
    FileType,
    ContentId,
)

MAIL_TEMPLATE = """
<html> Here you need to paste your email template using html language </html>"""
The above script includes a basic configuration which is: the SendGrid API package, email parameters, and HTML template. The last one was very important for our Team since the previous tool did not give us any possibility to align email templates with our other company emails (e.g. newsletters). Whereas, The SendGrid API provided full flexibility in shaping our emails look and content.
Emails Personalization
We also had to think about sending personalized emails with usernames or date ranges for sales or financial figures. To achieve that, we added to the HTML template some { } clauses and wrote some Python definitions that replaced them with custom values defined in the auto reports script:
def format_html(content):
    return MAIL_TEMPLATE.replace("{{date_range}}", date_range)

def format_html(name):
    return MAIL_TEMPLATE.replace("{{first_name}}", first_name)
Using a simple loop in the next steps of this project, we replaced a date_range and first_name with custom values assigned to each of our users.
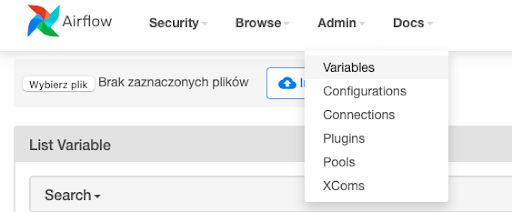
The next part of the script focused on the definitions used to configure emails of sender/receiver, subject of the email, attachment (we used a CSV file), and API keys that we decided to store in encrypted variables. Please remember that the API Key should not be shared with anyone outside the company, so do not try to upload your script on Stack Overflow or anything else on the web if you decide to use this tool as well. To avoid API leaks at your company, you can save it as encrypted text being part of Airflow variables.
For better reusability, we extracted that part of the script to a separate utility Python file that could be used in multiple DAGs. It allowed us to modify the part of the script without copying and pasting definitions between the scripts.
  def send_message_with_df_csv_attachment(
    to_emails, subject, name, content, df, filename, api_key
):
    sg = SendGridAPIClient(api_key)

    is_multiple = len(to_emails) > 1
    to_emails = to_emails[0] if not is_multiple else to_emails

    message = Mail(
        from_email="test@domain.com",
        to_emails=to_emails,
        is_multiple=is_multiple,
        subject=subject,
        html_content=format_html(name)
    )

    base64_csv = base64.b64encode(df.to_csv(index=False).encode())
    attachment_content = str(base64_csv, "utf-8")
    message.attachment = Attachment(
        FileContent(attachment_content),
        FileName(filename),
        FileType("text/csv"),
        Disposition("attachment"),
        ContentId("dataframe"),
    )
    response = sg.send(message)
    return response
In the above script, we defined some basic parameters of each email and attachment. What I like here is that this file does not need to be modified unless we have to change an email template or attachment type.
Configuration of Email Receivers
As you already know, we decided to keep each user name and email together with their reporting scheduling preferences in a separate Python file. We did it manually for all receivers since we had to send the reports only to a few external partners, but if you are going to send messages to hundreds or thousands of users, you can load their metadata directly to your script for easier and faster access. Keeping receiver details in a separate file was useful for us since we wanted to use the same receiver group for multiple different reports, e.g. some of them should receive reports daily but the rest only on the 1st day of the month. Thanks to that, the maintenance of this list is much easier for the Data Engineering Team if we need to update it in one location and all Airflow ETLs will automatically start using new user details, their scheduling preferences, etc. Here is a quick example of how that list can look like:
@dataclass
class Info:
    user_id: int
    user_name: str
    emails: List[str]
    subscribes_to: List[str]


INFO_LIST = [
    Info(
        user_id=12345,
        user_name="John Smith",
        emails=[
            "j.smith@domain.com",
            "john@domain.com"
        ],
        subscribes_to=[
            "daily",
            "monthly",
        ],
    ),
    Info(
        user_id=54321,
        user_name="Anna Wolf",
        emails=[
            "anna@domain.com",
            "a.wolf@domain.com"
        ],
        subscribes_to=[
            "weekly",
            "monthly",
        ],
    ),
Data Gathering For The CSV Report
All sales data is located in our database, and Data Team Engineering can get access to it using a simple SQL query. However, we needed different reporting schedule preferences, so the good practice was to save the SQL query in the configuration files and load it to each of the ETLs using custom auto_reports_query definition with {date_type}, {time_window_1} and {time_window_2} variables. These clauses were used by us to define the data range for different report types:
select * from data_source
where
date_trunc('{date_type}', date)::date
between
date_trunc('{date_type}', current_timestamp)::date - interval '{time_window_1} {date_type}'
and
date_trunc('{date_type}', current_timestamp)::date - interval '{time_window_2} {date_type}'
In the case of monthly reports, auto_reports_query replaced {date_type} with ‘month’, {time_window_1} with 0, and {time_window_2} with 1, so the query returned sales data for the previous month only. Here’s a quick example of how the whole task works:
@task()
def auto_reports_etl():
    from plugins.queries import auto_reports_query
    from plugins.common_modules import DATA_DIR

    hook = PostgresHook(postgres_conn_id="database")
    uids = ",".join([str(info.user_id) for info in info_list])
    sql = auto_reports_query(time_window_1=0, time_window_2=1, date_type="month", uids=uids)
    df = hook.get_pandas_df(sql)
    data_path = os.path.join(DATA_DIR, "auto_reports_monthly_data.csv")
    df.to_csv(data_path, index=False)
    data_sending(df)
    return data_path
As you can see in the above example, Python loaded a data set from our database using an SQL file stored in the utility file. But instead of loading the whole data set – which means millions of records – it loads only necessary data for the selected data range that matches the report (for weekly it will be only a previous week, while for monthly a previous month). Similar to the list of recipients, we once again preferred to keep that in one place and modify it using Python definition if needed instead of having five, ten, or more separate SQL files for each ETL and subscription type. It is a much better and easier choice for ETL maintenance, especially if you need to add one more condition or column to your report.
Configuration Of Email Sending and Slack Alerts
The next step focused on a script that connects all the previous ones, so it includes libraries, variables, API keys, definitions and all others needed to successfully auto-run the DAG using the Airflow server. This article is not about creating your first ETL. Therefore, I will skip all these basic steps where you need to configure DAG and provide some basic information such as setting run scheduling, connecting to SQL database, or creating a new table. These are crucial steps, and an auto report will not work without it, but setting an ETLs was already explained in many video tutorials, so for now, let’s jump to something more advanced and exciting!
At the beginning of the email configuration script, we started loading our Slack and SendGrid API keys from the Variables list on Airflow. Slack is optional, but in our case, we needed to inform the Data Engineering Team if anything happened with the data, ETL, or report itself. The list of potential issues is always different and depends on the data or project that you are working on. In our case, we struggled the most with data loading failures caused by blocked databases or missing information in the CSV report (null values). The second one, The SendGrid API key, is of course necessary to connect with the SendGrid server and send emails.
def auto_reports_daily():
    from plugins.util import s3_bucket, INFO_LIST
    from plugins import slack, sendgrid
    from airflow.models import Variable
    access_token = Variable.get("slack_api")
    sendgrid_api_key = Variable.get("sendgrid_api")
    data_cloud = data_bucket(config)
    data_cloud_key = "auto_reports/test_report_1.csv"
    my_info_list = [uid for uid in INFO_LIST if "daily" in uid.subscribes_to]
What exactly does the definition do? It loads already mentioned API keys, connects and creates an empty test_report_1.csv file on the server (AWS, Google, etc.) and collects a list of users from the INFO_LIST for whom the scheduling interval was selected as “daily”.
In our utility file, we have also created an attached send_report_to definition that automatically loads all user metadata from INFO_LIST and uses them for the reports-sending process.
   def send_report_to(to_emails, df, attachment_filename, name):
        sendgrid.send_message_with_df_csv_attachment(
            to_emails,
            subject="Your Sales Report",
            name=name,
            content="",
            df=df,
            filename=attachment_filename,
            api_key=sendgrid_api,
        )
The Mentioned Slack alerts were optional, but we decided to use them. Thanks to that, our Data Engineering Team knew when ETLs were running and which users did not get their reports, so anyone from the team could investigate and fix issues immediately. However, we wanted to develop some kind of personalized notifications that not only inform everyone that “something went wrong” but also explain for which users or metrics issue has been found. You can see an example of one of these alerts in the attached screenshot below. Obviously, if your report does not include any issues, send_report_to should be running at the end of the loop.
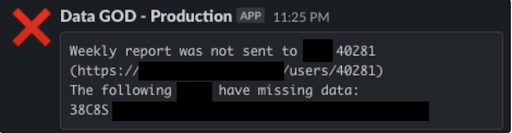
The above screenshot is a perfect example of when an email could not be sent. The weekly report for user 40281 was missing data about one of his sales, e.g. value or quantity. Airflow did not send an email to the user (skipped his user_id in the process) but Slack sent the Data Engineering Team the above notification with product_ID and a link to all the details (hidden on the screenshot for security reasons), so the Data Engineering Team could open his data and investigate it.
Summary
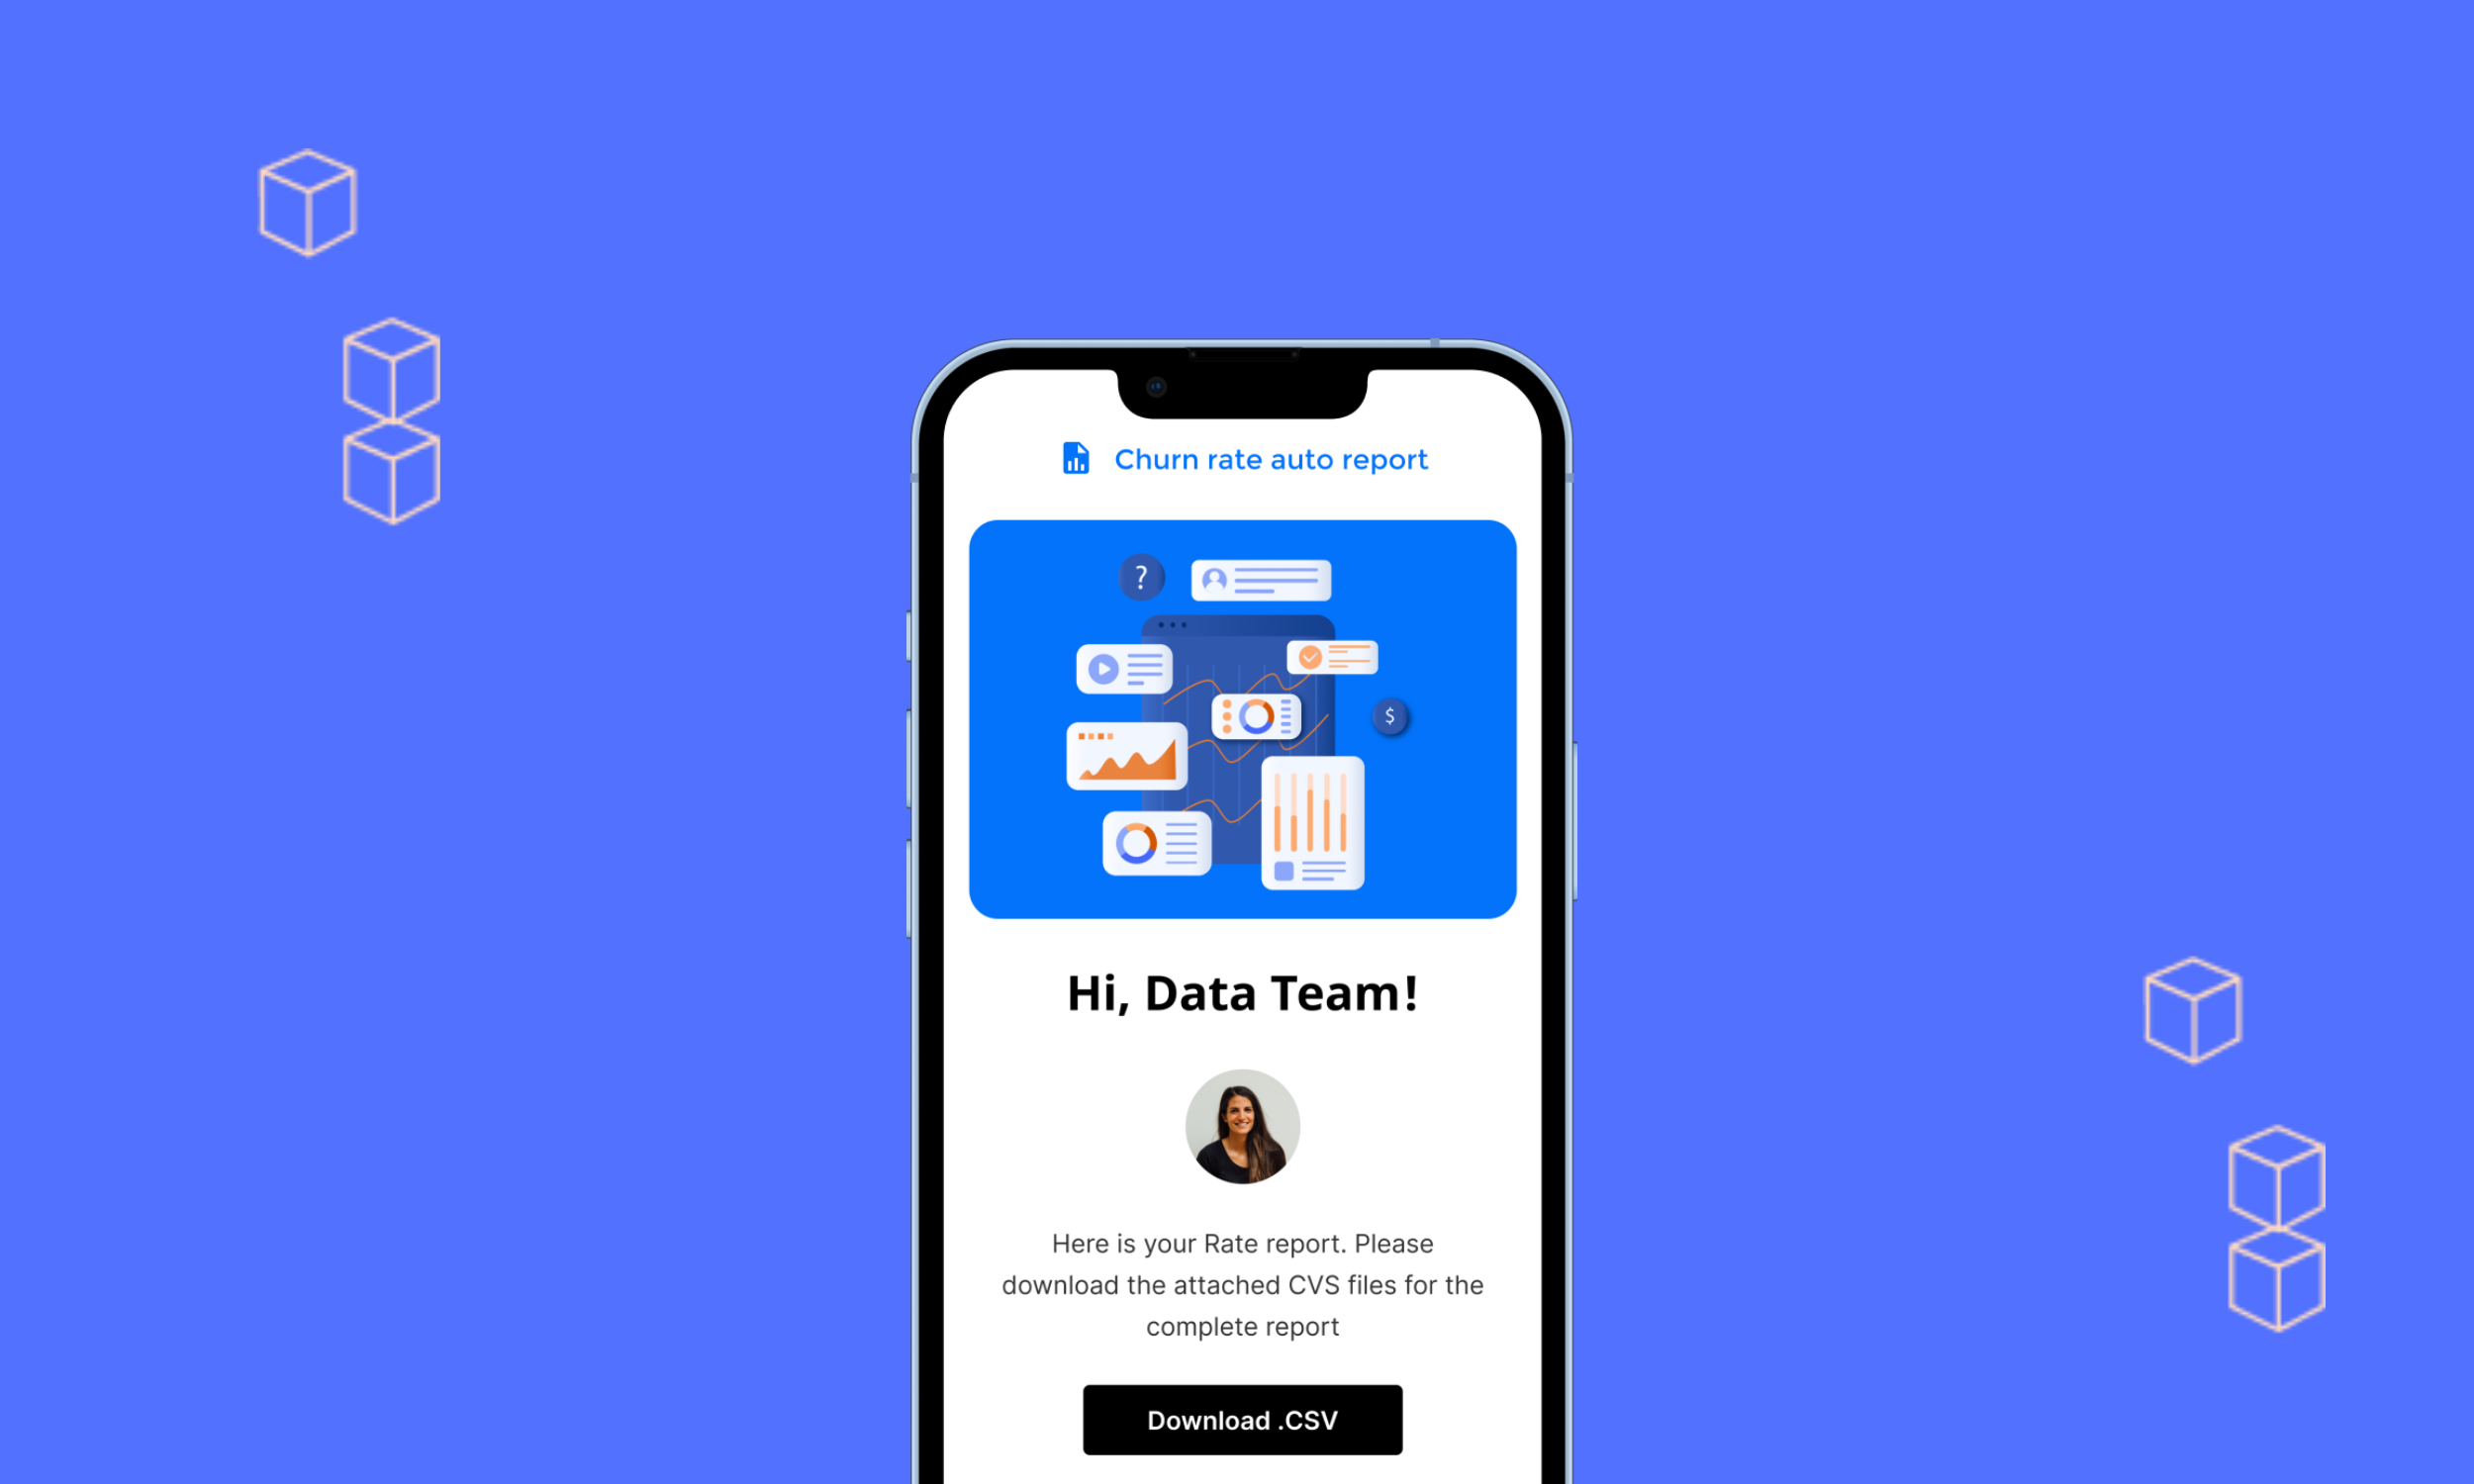
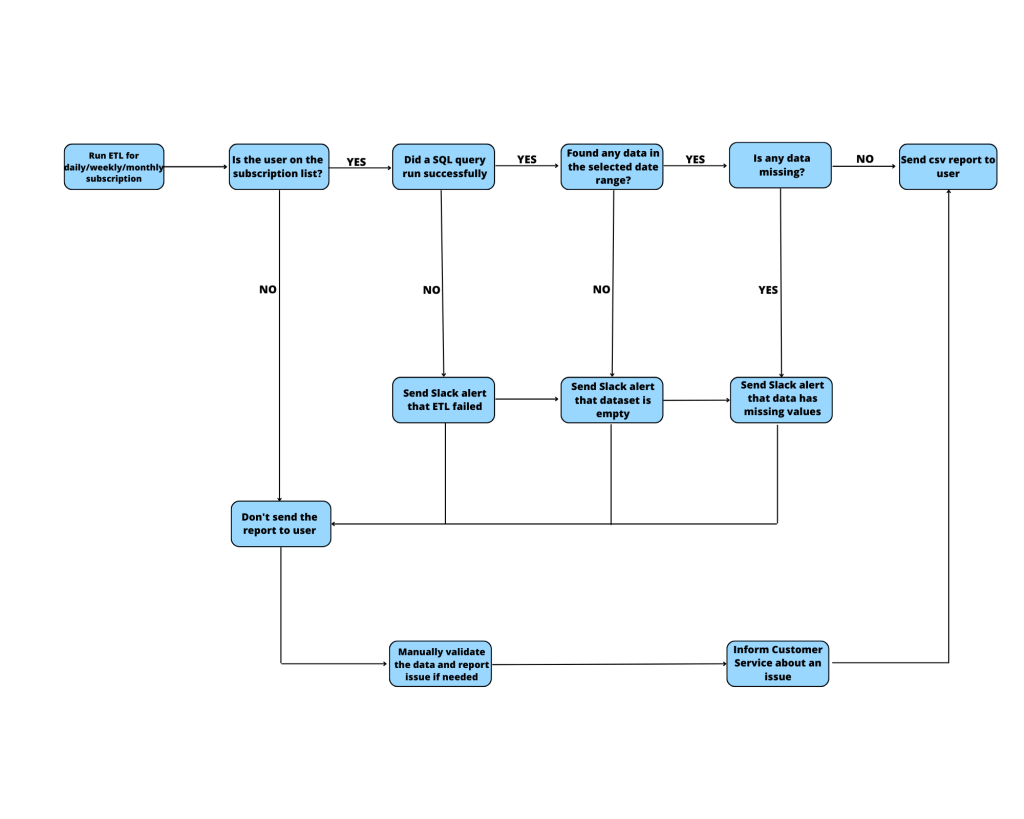
Now it’s time to discuss the final effect of our work. Once a script stops running, the partner for whom data validation was completed (no missing info) will get an email with a CSV attachment. That email will include only the data from the database that matches his user_id and the date range defined by the auto report scheduling. The script loads combined data for all users based on their scheduling preferences, and then creates individual data sets for each of the users to avoid sensitive data leaking. The workflow of this ETL is introduced in the attached graph.
I don’t want to sound immodest, but after all the above efforts, our new email reports look really impressive. They turned out to be much better than the default emails sent by our previous reporting system from the external visualization tool. We got a lot of positive feedback from our partners, and the new system hasn’t failed since the very beginning of its launch, which was already months ago. It is the best recommendation that makes us proud!
Thanks to the elimination of all repetitive manual steps for sending reports, we also decreased the risk of human error. All processes work fully automated and do not need to be monitored unless one of them fails or Slack informs the Data Engineering Team about some data missing information. It is a huge step forward that offered a much better experience for the recipients of the emails and gave us the possibility to focus on the new projects and automation thanks to the saved time.